Home
Articles
Industry
Interfaces Support Contact Why Tire//SMART
Augmented Point of Sale
Integrated Accounting
Service//SMART (cell phone marketing)
Automated shop inspection tablet (J-Tab)
Customer Retention Management
Artificial Intelligence (using embedded analytics)
GBMS Replacement/conversion
Mfg Purchase Resale (Car Dealer//HUB)
Automation Inventory item id setup (J-Library)
Hunter Alignment Integration
RT-Systems Integration
Integrated Document Imaging Service (J-Doc)
Preprogrammed Keyboards
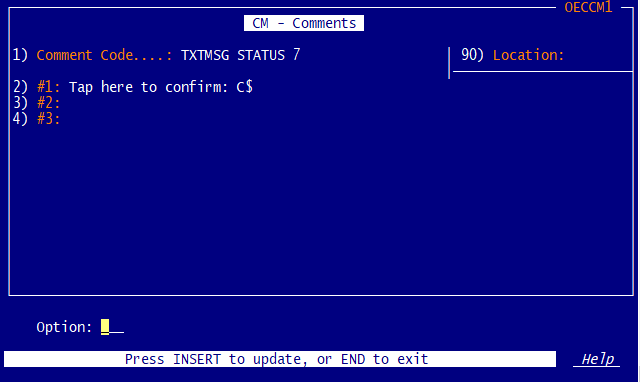
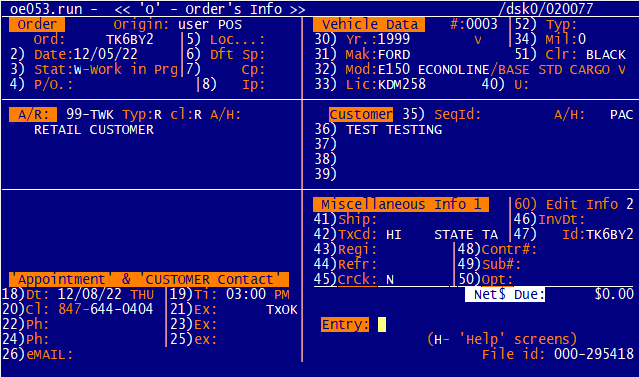
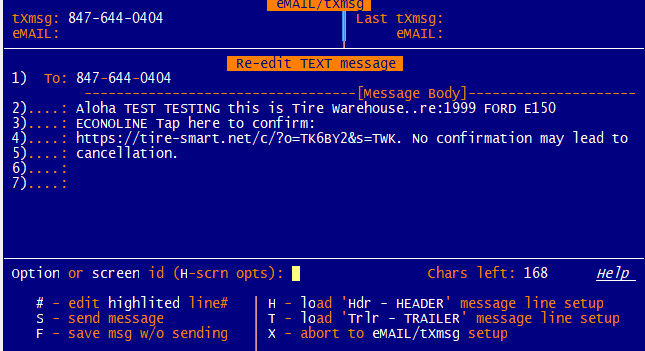
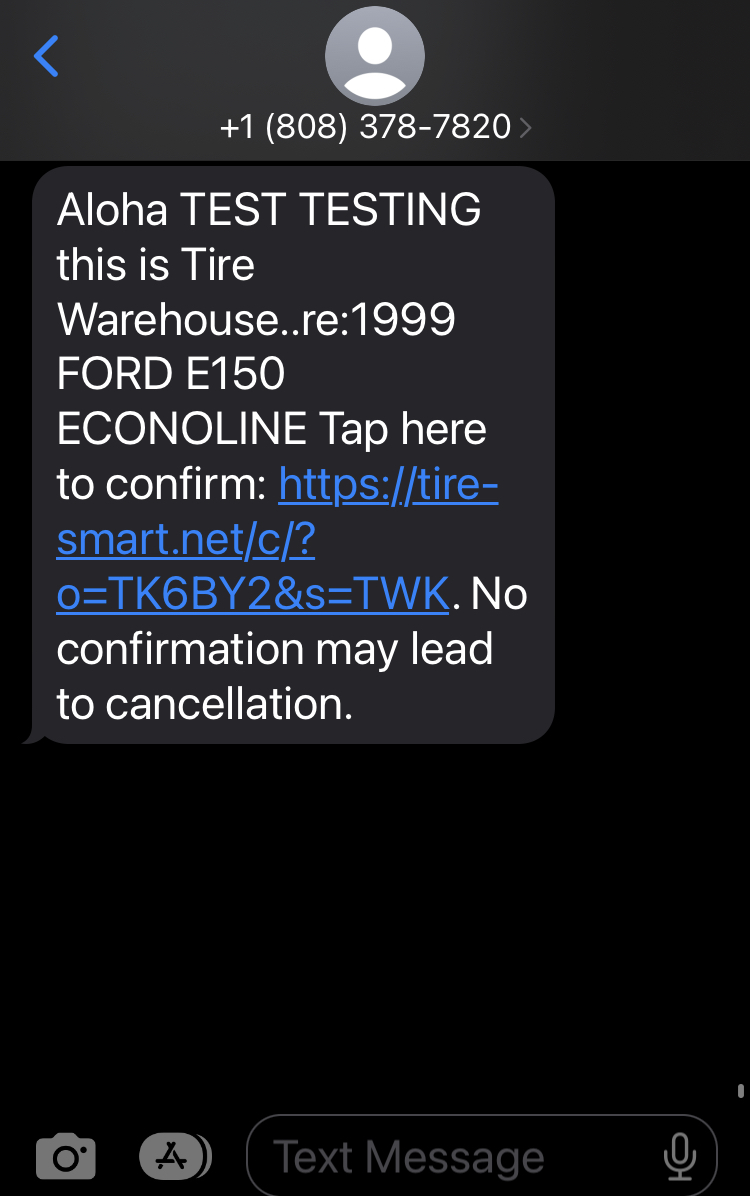
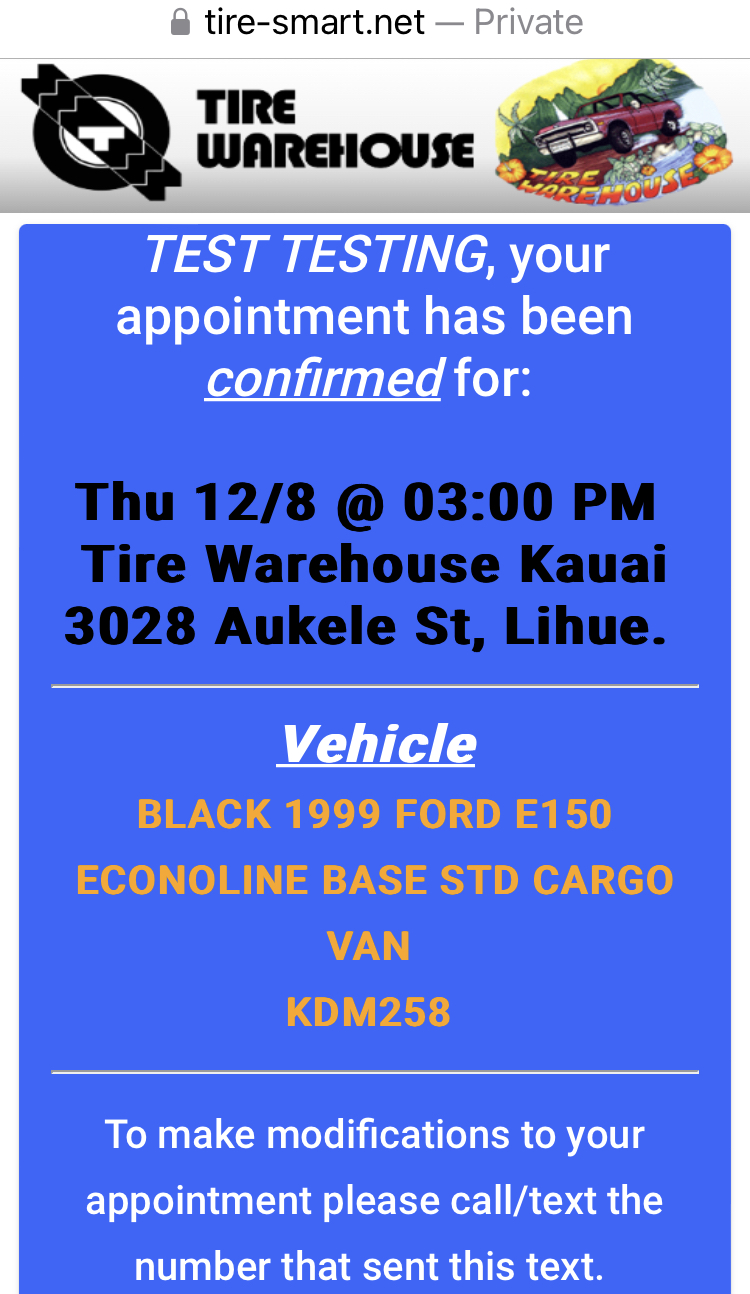
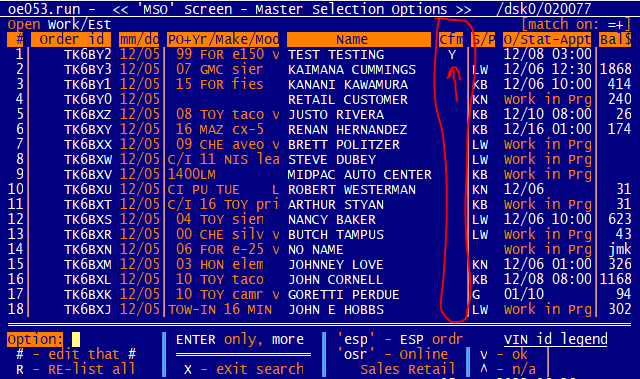
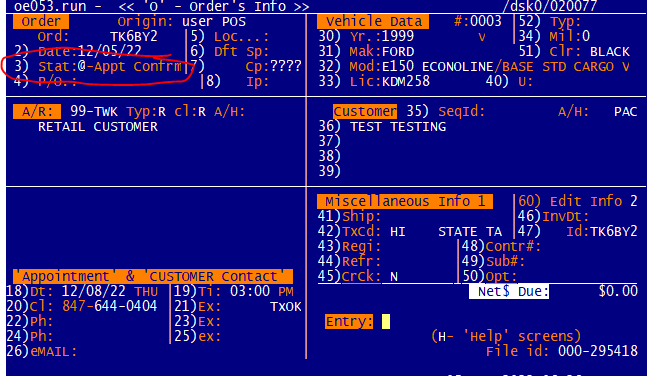
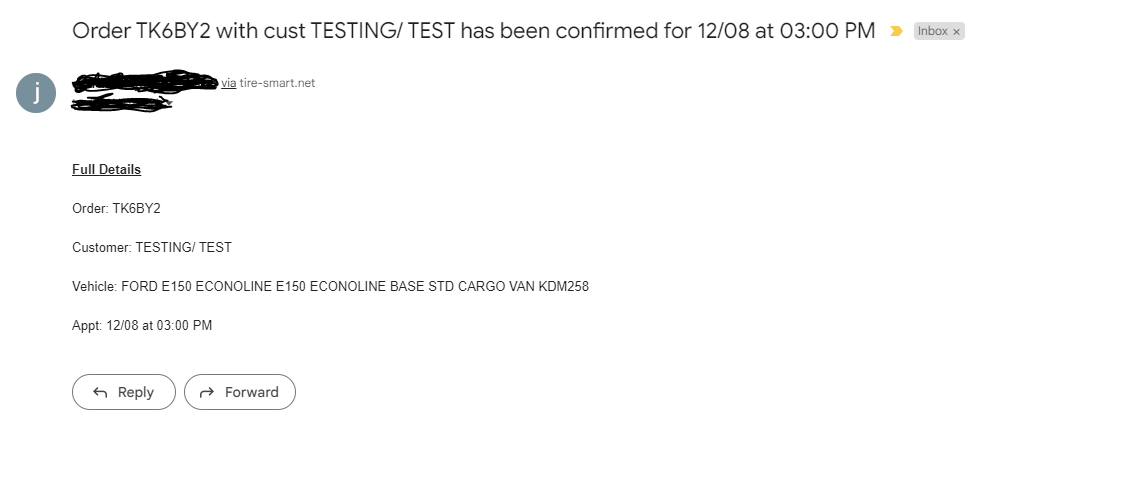
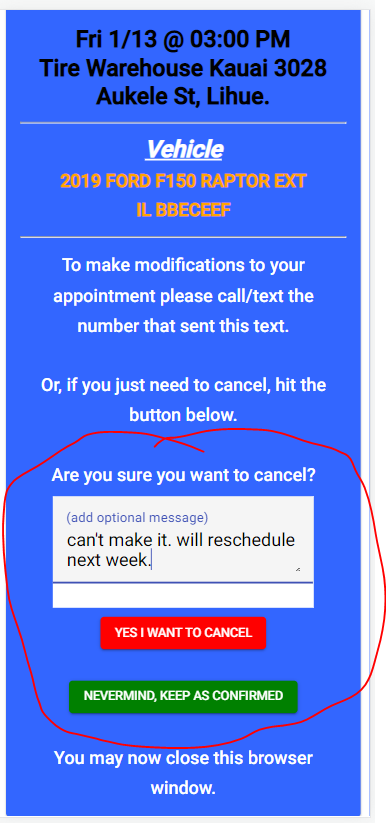
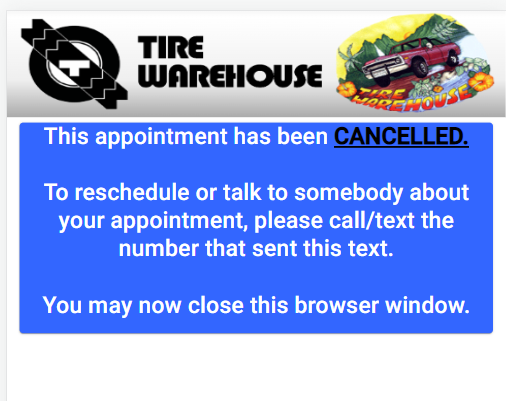
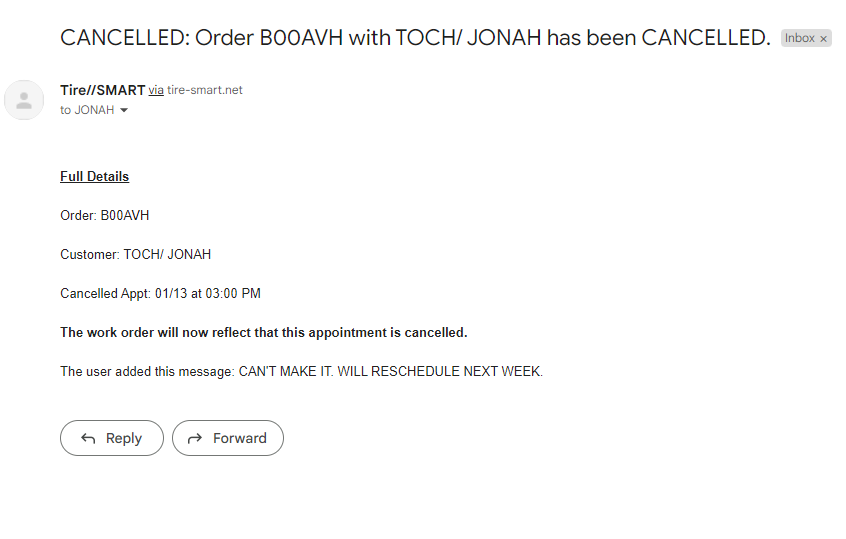
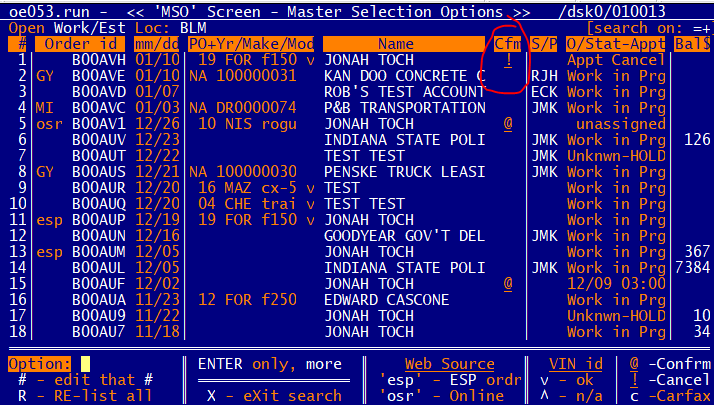
Automated Text Messages
Interfaces Support Contact Why Tire//SMART